Windows Vista is the most advanced operating system offered by the software giant, Microsoft. The abundance of new and improved features and processes makes it the most sought after operating system. If you are one of those who have installed Windows Vista on your computer, you should ensure proper maintenance for smooth functioning of your computer.
Many a times, you must have experienced extremely slow computer performance and blamed it on your Vista operating system. However, this is not the case. It is not your Vista operating system that causes your system to run slow; it is problems with the Vista's registry that is the culprit.
Therefore, you should make sure that it is regularly cleaned for optimum system performance. The most affordable and efficient way to improve Vista performance is by installing a good registry cleaner on your system.
The Windows Vista registry does not have its own internal cleaning tool. Therefore, as you keep on installing and uninstalling software programs and hardware, your computer's registry keeps on accumulating junk and redundant information. This causes your computer to run slow in booting process and occasionally freeze or crash. This is where a good cleaner comes to speed up vista boot and other problems
Superior cleaning software programs scan and repair all the errors in the Vista registry and thereby free the registry of any issues. Therefore, cleaners improve Vista performance by clearing up the congestion in the Vista's registry. These cleaners also remove invalid DLL entries that help you to improve Vista performance. In addition, these cleaners provide you with the flexibility to defragment your system regularly so that your system gives optimum performance.
Therefore, it is suggested that you immediately install one of the affordable and efficient cleaners on your system. A good cleaner can be scheduled to regularly scan your Vista registry and identify potential errors. Registry cleaners provide you with updated information on the scan results, the errors detected, and the repairs made.
You also have the option to set the cleaning software to automatically repair these errors or just report these errors so that you decide how to conduct the repair. For your ease and convenience, these cleaners also have the ability to create backups of any repairs that are made so that you can recover any changes. Therefore, if you want to improve Vista performance and ensure smooth running of your computer it is important that you install a good cleaner on your computer.
Tired of slowing PC performance? Do you want to repair and improve Vista performance in cheap and fast way? You can scan the registry error in your computer for free and fix them with the best registry cleaner on the market. After scanning and fixing your PC, you will be surprise how fast your computer is.
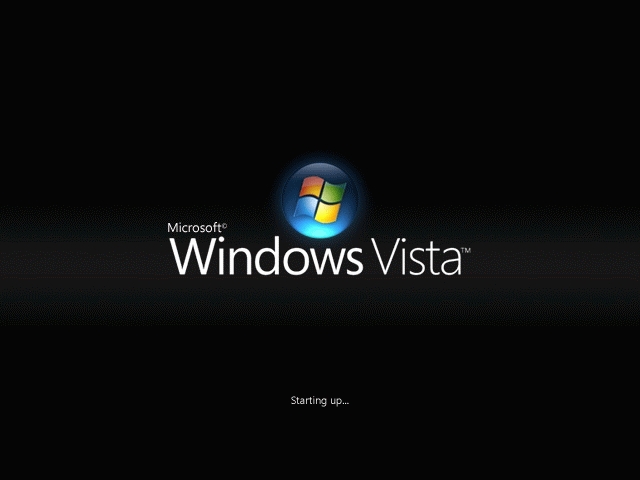
How to Speed Up Vista Boot Performance
Saturday, September 12, 2009
Windows 7 is much batter than windows Vista

Windows 7 will be Vista, but much better, recently said Microsoft director Steve Ballmer. The last few days, what pieces of leaked information about new features in the next version of Windows. According to Ballmer, the user interface of Windows 7 already brighter than that of Vista. It is he indeed a major software launch instead of just a refresher of Vista: "It is much more than a minor release." He also says that Windows 7 will be compatible with Vista.
Meanwhile, though some information leaked about the pre-beta build of Windows 7, Microsoft shows the Professional Developers Conference (PDC) in Los Angeles. It would be a recent M3 (Milestone 3) build, completed on October. From an older M3 build came in September details and screenshots online. At that time was that the new operating system-in-progress still seemed very much like Vista.
Here are some new features in Windows, based on previously known information and tips from anonymous sources.
> Device Stage: a central location that provides a convenient user interaction with peripherals such as printers, cameras, mobile phones and media players. These devices serve Device Stage or support. Microsoft defines the function as follows: "Device Stage is a new way for consumers to manage, explore, sync, print or other common, machine-related tasks."
> Action Center: a self-diagnostic function that helps users to troubleshoot their Windows 7 systems to solve.
> Streamon: one way audio and video content on PCs and devices to manage.
> A new animation framework for personalized animations.
> New taskbar and Power Shell integration.
> Multitouch and gesture recognition.
> Improved Bluetooth support (it is not clear whether this goes beyond the new level of support that Vista Service Pack 2 will add)
> More Ribbons: As revealed in the previously leaked M3 build, Microsoft adds ribbon-UI to the applets that are part of Windows.
Microsoft PDC will also show a number of other functions that have not been incorporated into the pre-beta that is provided to participants. The company already working on new internal builds.
The best free software for a basic use of your PC
Wednesday, September 9, 2009
 If you want to install software on your computer, you can opt for the well-known commercial software you pay for. But this way, the total cost for your computer an expensive picture. However, there are free software packages available that are not paying for the packages need to be doing and you can offer a real alternative. Here is an overview of such an effective free software for basic use of your computer.
The operating system of your PC
There are some good alternatives on the market for Windows, the most obvious system to replace. One of the packages that you can install Linux. The advantage is that you do not have much IT knowledge in order to get started. The Linux software gives you a good basis for an effective way with your computer to go.
Anti-virus program
Once you have installed the operating system, you should immediately start an anti-virus program. The classical free anti-virus program is AVG, which is a good protection against unwanted viruses. Research has shown that AVG is good enough for a good security against infection with viruses.
It is a free anti-virus program that rarely or never should be paying for the anti-virus programs.
Another anti-virus program that is reasonably effective against danger, is Avast.
Anti-spyware on your computer
In addition to protection against viruses, we advise against spyware for your PC to cope with. Spyware can gather information from your computer, allowing people with wrong intentions could be possession of information. Examples of free anti-spyware programs are Ad-ware, Spybot and Anti-Malware.
Cleaning your PC
For cleaning of your PC is an excellent and free program called CCleaner that is where the C stands for "crap" or "waste". CCleaner delete cookies from your computer, as well as temporary files and websites you've visited recently. You can also delete the locations of the programs you have downloaded. Moreover, you CCleaner to empty the recycle bin and any errors to detect. Another possibility in this area is the Free Internet Window Washer. It is one of these programs to use your computer to clean.
Word processing and document management
If you need text processing and spreadsheets to use, Open Office is the ideal solution. OpenOffice is both business and private use. It is an international package of documents you can store and manage. Open Office also offers the possibility for HTML editing and vector graphics.
How to Configure IP Address on Windows XP?
Tuesday, September 8, 2009

By using ipconfig, you can see the IP address of your PC in Windows XP. This IP address is configured by any person. If you want to use Internet, you must have to configure IP address. Moreover, if you want to share some files or want to copy some files from other PC into your office or campus LAN, you must have to configure the IP address. It’s a very easy way. In this page, you will find the ways to configure the IP address in Windows XP. Just keep reading…
IP address can be configured by two ways. The are:
* Manually configuration
* Dynamic configuration
Manual Configuration
In manual configuration, you have to assign all the IP address manually. To configure IP address manually, follow the following steps:
* Click on Start menu.
* Now go to Control Panel.
* From the control Panel, go to Network Connections.
From the Network Connections window, you will see Local Area Connection. Double click on that icon or click right mouse and go to the properties. Now, you will see the following figure and click on Properties of that window.
After clicking Properties options, another Local Area Connection Properties window will be opened.
Form the Local Area Connection Properties window select Internet Protocol (TCP/IP) and double click on it.
After double clicking, you will find Internet Protocol (TCP/IP) Properties.
Now, select Use the following IP address and put the IP address, Subnet mask and Default gateway which will be provided by the Internet connection provider or the IP address of your office or campus LAN. For example, my PC is connected to my campus LAN. The IP may be 192.168.10.10, Subnet mask may be 255.255.255.0 and Default gateway may be 192.168.10.1.
Now put Preferred DNS server and Alternate DNS server address by selecting Use the following DNS server addresses option. For example, Preferred DNS server address is 111.22.33.44 and Alternate DNS server address is 111.22.33.45. So, put the in the address field.
* At last, click on OK and finished configuring the IP address.
After doing all these steps, check whether you successfully configured the IP address. For this, go to Start, then click on Run, type cmd and hit Enter. Now a black window will be open and write ipconfig /all and hit Enter. Now check whether all the IP related information matches properly. If not, please correct them by configuring the above steps again.
So, by following the above steps you can configure IP address manually.
Dynamic configuration
Dyanamic configuration is very easy to configure. Remember, dynamic configuration is only possible if you have a DHCP server. If there is a DHCP server, IP address can be configured dynamically by following the steps:
* Click on Start menu.
* Now go to Control Panel.
* From the control Panel, go to Network Connections.
* Double click on Local Area Connection and select Properties and then double click on Internet Protocol (TCP/IP).
Form the Internet Protocol (TCP/IP) Properties window, select Obtain an IP address automatically. Later select Obtain DNS server address automatically.
At last, click on OK and finished configuring your computer’s IP address.
By following the above steps, you can easily configure IP address dynamically.
Reduce your disk space with windows xp file compression
Friday, September 4, 2009

File compression reduces the amount of disk space that is required to store files and increases the amount of information that can be placed on a single volume. This is useful on a volume that is running low on available disk space. Windows XP Professional supports file compression on NTFS volumes only.
You can enable compression for an entire NTFS volume, for one or more folders, or for individual files. Each file and folder has its own compression attribute that you can control on an individual basis. Windows provides compression entirely through NTFS, and after a file or folder is compressed, that compression is transparent to applications and users. The NTFS compression filter automatically decompresses files into memory when you open them and compresses any files again when they are saved to the disk. To enable compression of a volume, folder, or file on an NTFS partition, follow these steps:
1. In Windows Explorer, right-click the volume, folder, or file that you want to compress and select the Properties option from the action menu.
2. In the Properties dialog box for the volume, folder, or file, on the General tab, click Advanced.
3. In the Advanced Attributes dialog box, select the Compress Contents To Save Disk Space option and click OK.
4. If you have selected a folder that contains files and subfolders, you will be prompted to apply compression—either to the folder only or to the files and subfolders, Select the appropriate response and click OK.
Installing Hardware in Windows XP
Thursday, September 3, 2009

It is easier to install hardware in Windows XP than it is in any previous version of Windows. Support for Plug and Play devices that largely configure themselves and the inclusion of more hardware drivers than ever before with Windows XP means that users are more comfortable installing hardware themselves. However, there are still many details that you must get right, and often users will call on you to help a user
install and configure new hardware.
To install any new hardware, you must perform the following general steps:
1. Connect the device to the computer. Sometimes, this means opening the computer case and adding new memory or an expansion card. Other times, it simply mean plugging a new device into an external port and turning the device on.
2. Install the device drivers and other software in Windows so that the operating system can recognize and communicate with the device. Windows XP may already have the necessary drivers, or you may need to supply them.
3. Test the new device to make sure that it works properly and that it does not interfere with other devices on the computer.
The vast majority of devices that you encounter in windows xp are likely to be Plug and Play devices, which makes job a lot easier. However, if you have computers with older devices or older computers that have been upgraded to Windows XP, you may run into non-Plug and Play devices that require a little more effort to install than simply connecting the device.
You can use the Add Hardware Wizard to install and configure non-Plug and Play devices and Plug and Play devices that have been recently connected to the system (but for whatever reason were not detected automatically). You can also use the Add Hardware Wizard to access Windows XP troubleshooting tools for all installed hardware.
Adding a Device by using the Add Hardware Wizard
To install a new device by using the Add Hardware Wizard, follow these steps:
1. From the Start menu, select Control Panel.
2. In the Control Panel window, select Printers And Other Hardware.
3. In the Printers And Other Hardware window, in the See Also list, select Add Hardware to start the Add Hardware Wizard. After reading the Welcome To The Add Hardware Wizard page, click Next.
4. The wizard searches the system for new devices and then asks whether the new hardware is attached to the computer,Select Yes, I Have Already Connected The Hardware, and then click Next.
Optimise Your Desktop Environment for Performance Boost
Wednesday, September 2, 2009
If you think your desktop looks pretty then you’re probably using too much your RAM and Processor just to “draw” that shiny, transparent and generally sexy desktop.
If you’re serious about running your computer at maximum speed then you need to choose a very plain, low resource intensive desktop environment. The following steps below will show you how to accomplish this in Windows XP and in Windows Vista.
On Windows XP:
1. Right Click “My Computer”
2. Click Properties
3. Click the Advanced Tab
4. Under Performance click Settings
5. Click the radio button “Adjust For Best Performance”
6. Click Apply
7. Your screen will go gray for a few seconds while your desktop is being optimized for the best possible performance.
8. When the optimization has been completed click Ok.
How to optimise the Windows Vista desktop environment:
1. Right Click “Computer”.2. Click Properties.
3. On the top left of the screen click “Advanced System Settings”.
4. Under performance click settings.
5. Click the radio button “Adjust For Best Performance”
6. Click Apply
7. Your screen will go gray for a few seconds while your desktop is being optimised for the best possible performance.
8. When the optimization has been completed click Ok.
9. You Desktop will now look like:
How to Configure IP Address on Windows XP?
Tuesday, September 1, 2009

By using ipconfig, you can see the IP address of your PC in Windows XP. This IP address is configured by any person. If you want to use Internet, you must have to configure IP address. Moreover, if you want to share some files or want to copy some files from other PC into your office or campus LAN, you must have to configure the IP address. It’s a very easy way. In this page, you will find the ways to configure the IP address in Windows XP. Just keep reading…
IP address can be configured by two ways. The are:
* Manually configuration
* Dynamic configuration
Manual Configuration
In manual configuration, you have to assign all the IP address manually. To configure IP address manually, follow the following steps:
* Click on Start menu.
* Now go to Control Panel.
* From the control Panel, go to Network Connections.
From the Network Connections window, you will see Local Area Connection. Double click on that icon or click right mouse and go to the properties. Now, you will see the following figure and click on Properties of that window.
After clicking Properties options, another Local Area Connection Properties window will be opened.
Form the Local Area Connection Properties window select Internet Protocol (TCP/IP) and double click on it.
After double clicking, you will find Internet Protocol (TCP/IP) Properties.
Now, select Use the following IP address and put the IP address, Subnet mask and Default gateway which will be provided by the Internet connection provider or the IP address of your office or campus LAN. For example, my PC is connected to my campus LAN. The IP may be 192.168.10.10, Subnet mask may be 255.255.255.0 and Default gateway may be 192.168.10.1.
Now put Preferred DNS server and Alternate DNS server address by selecting Use the following DNS server addresses option. For example, Preferred DNS server address is 111.22.33.44 and Alternate DNS server address is 111.22.33.45. So, put the in the address field.
* At last, click on OK and finished configuring the IP address.
After doing all these steps, check whether you successfully configured the IP address. For this, go to Start, then click on Run, type cmd and hit Enter. Now a black window will be open and write ipconfig /all and hit Enter. Now check whether all the IP related information matches properly. If not, please correct them by configuring the above steps again.
So, by following the above steps you can configure IP address manually.
Dynamic configuration
Dyanamic configuration is very easy to configure. Remember, dynamic configuration is only possible if you have a DHCP server. If there is a DHCP server, IP address can be configured dynamically by following the steps:
* Click on Start menu.
* Now go to Control Panel.
* From the control Panel, go to Network Connections.
* Double click on Local Area Connection and select Properties and then double click on Internet Protocol (TCP/IP).
Form the Internet Protocol (TCP/IP) Properties window, select Obtain an IP address automatically. Later select Obtain DNS server address automatically.
At last, click on OK and finished configuring your computer’s IP address.
By following the above steps, you can easily configure IP address dynamically.