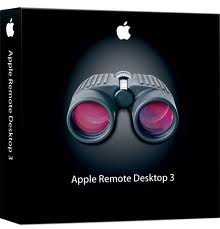
One of the best uses of remote desktop is in a computer lab, classroom and even at work. Remote desktop allows the teacher or administrator to monitor what happens at the individual workstations. It saves the teacher from going around the classroom to check each student's progress, while the administrator will be able to check whether an employee is doing something on his workstation the company prohibits or forbids. It also allows for instant communication between the administrator computer and the remote workstation. This can be done on PCs running on Windows OS and on Macs running on OS X.
# Step 1: Download the latest Apple Remote Desktop software if you haven't done so. First, install the Client package on the workstations you want to administer (client computer). Follow the on-screen instructions of the installer package.
# Step 2: Open "System Preferences" and click on "Apple Remote Desktop." Make sure the option for "Start Apple Remote Desktop client at system startup" is enabled. Then, set access privileges on each client computer by going to the "System Preferences," "Sharing or Remote Desktop," and then choosing "Apple Remote Desktop."
# Step 3: Go to your administrator computer and install the Administrator package and follow the on-screen instructions.
# Step 4: Go to the "Applications" folder and open the Apple Remote Desktop program. Enter the serial number that came with your software. It is found on the Apple Remote Desktop welcome document. Then, click "Continue." You'll be asked to enter a Remote Desktop password, so be sure you take note of this. Click "Done." The main application window appears.
# Step 5: View a list of the client computers that you've set up on the network at the main window. You need to authenticate the users that appear on your master list before you can administer the client desktop. You can also arrange your list into groups to make it easier for you to administer.
How to Use Remote Desktop in Mac OS X?
Tuesday, March 15, 2011
Labels:
How to Use Remote Desktop in Mac OS X
Posted by
Joseph Rios
at
12:47 AM
![]()
Subscribe to:
Post Comments (Atom)
0 comments:
Post a Comment